Quilt Project

Sunday, February 19, 2012

Fabric WIPs

Circles WIP

I have finally started working with dye again after the baby-related hiatus. (Dye powders and  little ones do not mix.) My inspiration partially comes from knowing I will be attending a 2 day shibori workshop the last two weekends of March. The workshop, taught by Amber Coppings is hosted by the Fiber Arts Guild of Pittsburgh, which I recently joined as a member.

Squares WIP

The second inspiration comes from my long-term desire to fill my fabric stash with less commercial fabrics. I'm actually about to dump a load of PFD white cotton in the wash to get ready for a few more runs of color. The green and orange dyes are calling my name today for some reason.

Both of the above pictures fabrics are works in progress. Each have been dyed a shade of red, resisted with soy wax and over-dyed with another shade of red, and discharged. I'm currently contemplating adding another color or doing some embroidery work. Only time will tell...

Friday, February 17, 2012

Another Baby Quilt

"Modern Circus" Baby Quilt WIP

A wonderful woman in the monthly book club I attend, Bookish Babes of Pixburgh, is having a baby in March. Unable to attend her baby shower I still wanted to make something to help celebrate welcoming her first child into the world. Next week the book club is getting together so I am spending today and part of the weekend finishing the quilting and binding.

I contacted her when I learned of the shower to find out if she minded me making something and if she and her husband had selected colors or a theme. She told me there was a lot of orange in the nursery and in the end it ended up having a sort of circus theme. Inspired I selected a variety of bright solids and began piecing them together. The above is the quilt as a work-in-progress (WIP). Once it is completed I will post detailed pictures.

Thursday, January 12, 2012

Project: Christmas Gifts

Screen Printed Flour Sack Towels
 For the last several years I have been making Christmas gifts for friends and family. This year due to some time constraints we decided to screen print most of our gifts and limit the amount of sewing time. This ended up being a good decision because my foot controlled died a week and a half before we left to visit family out of state. Making the screens still took a lot of time, but the actually printing was over in a matter of minutes.

Queen Anne's Lace
 We have been inspired by so many things since our move to Pittsburgh. This Fall I marveled at how beautiful Pittsburgh becomes as the leaves change colors. It reminded me of the time I lived in Canada. Ah... seasons. We designed the images for our screens based on some of the Fall foliage that stood out to us while we were traveling and walking all over the city. Looking out our window was also pretty inspiring due to the beautiful view of the park across the street. I took pictures of various leaves, sketched, and collected samples as they fell from trees.
Japanese Maple Leaves from the Yard
 We were able to complete three handmade screens using acrylic paint. My next challenge with these screens is layering the design with detailed accents. Ginko leaves have these fine lines that fan out to the ends of each leaf. I imagine lawn creatures using them as fans or shade when the sun is high.

Ginko Leaves from Our Yard
We heard our nephews were getting a kitchen for Christmas. They love to "make" food when they play together. Just the other day Sebastian was opening a candy store and made me soup out of blocks. I thought it would be fun to make them some play food they could use while playing in their kitchen.
Felt Bacon Strips
Se
Sushi Roll
 It seams like we rarely have a weekend breakfast without bacon; therefore, the boys needed to have bacon, too. Although the boys are young, 2 and 4, they have incredibly cultivated palettes. I think it is great they both enjoy eating sushi. The sushi was a little experimental, but I was happy with the results- especially the "mock-i". The place mats were an extra-special touch contributed by The Architect.

Different view of the sushi roll
Tuna "Mock-i"

Tuna "Mock-i"
We also made a couple of turkey legs just for fun. It was an opportunity for The Architect to practice sewing. That was a lot of fun. He did well, which makes me hopeful for our next sewing project- his new messenger bag.

Turkey Leg

Tuesday, December 6, 2011

Christmas Gifts in the Making

I have been home sick for the past two days with stomach flu, which has prompted me to update my poorly updated blog. I'm hoping stomach flu is not the only motivator I have in my life to a. update my blog and b. lose 5 pounds. No matter, both a and b have been achieved.

I haven't made a whole lot of things lately because I have been getting the studio organized. We have also had other things going on with the house, Sam, and family so making had to be put aside. Christmas is as good a reason as any to get back into making things. Over the weekend I spent some time preparing new screens for our Christmas gifts. I am hoping this weekend I will be able to start putting the images on the screen and get a few test prints made. Images to come.

Sunday, September 4, 2011

Birthday Gift for Sister-in-law

My beautiful sister-in-law, Eliza, recently had a birthday. Not too long after we arrived in Pittsburgh she mentioned she would love to have an assortment of cloth napkins to use for dinners. She said she would love to have an assortment of fabrics that didn't necessarily match but were color coordinated.

A variety of napkins
Peter and I selected 15 different materials from Marmalade Fabrics, which is an online fabric retailer. Tammy, the owner, has incredible taste in fabric and she has quickly become one of my favorite resources. She's really good at selecting highly sought after fabrics as they come out each season.  The napkins measure out 15.5" square. They were serged, to help avoid future fraying, and then hemmed.

Napkin rings
In addition to the napkins I also altered some napkin rings we purchased. I used some of the scraps and some buttons I found to liven up the simple silver rings. The embellishment is held together by a snap so it can easily be removed if she wants to only use the simple ring.

"Fancier" set
I also made a "fancier" set for when she hosts dinner parties. I have always liked the idea of napkin rings, but hated the idea of having multiple sets for holidays and fancy dinners taking up space in a cupboard. This ways the she only has the one set of napkin rings with interchangeable embellishments, which will take up a little less room.

New Studio Space and Craft Table

Craft Table
I have a studio space after many years on living in tiny spaces and like a semi-nomad. (I mean, seriously, when I moved back from Canada the majority of my belongings fit in my tiny hatchback, Yoshi.) Texas homes aren't really known for basements, so you can only imagine my excitement when I moved into a house with a basement spacious enough to allow for a designated space for crafting. Aside from just having the space, the basement is also equipped with an industrial sink and shower for when I need to blow out screens or work with dyes. I've been feeling like a kid in a candy store every time I'm down there- even if it only going to get the laundry.

The space I selected for crafting had some pretty gnarly wood paneling, which we recently finished priming. Our plan is to paint it a clean, light color with grey trim. It will brighten up the space and not drastically effect colors in the fabric I am either making or using for projects.

Studio space before priming and table construction

Awesome built in with cool red light fixtures
The first thing I needed to do was craft a workspace large enough for the various media/projects, such as pattern cutting, screen printing, quilting, etc. We went to Construction Junction and picked up two used lab cabinets for cheap. I wanted to get something to act as the base of the table but also could be used potentially for storage. The day they went to Construction Junction they had a ton of cabinets that had been donated from some lab.

Table in progress...

We also picked up two large 4X8 sheets of plywood to act as the tabletop. Peter then screwed the boards together to help avoid each individual sheet from warping.
Peter in action
After the table was screwed down it needed to be covered. I used a sandwich of plastic, quilt batting, and muslin, which we stapled to the underside of the table top.

Quilt batting layer
In order to really support cutting out fabric and screen printing I think a good craft table needs a little bit of spring or cushion. To do this I bought queen size quilt batting, which I doubled over.

The layering technique makes it easier to pin down fabric when cutting out patterns, when printing t-shirts, or dying fabric. This table easily holds T-pins and fabric pins. When stapling just make sure you do it one layer at a time and each layer is pulled tightly to the edge. Over time the muslin may wear out or get dirty. As well, the batting may lose its fluff. Fortunately it can easily be pulled off and replaced with a fresh batch of new materials.

It's been a little while...


Sam's feet
So, it's been a little while...
Sam was born Thursday, April 21, 2011. Since then we have also relocated to Pittsburgh. We did this when Sam was a mere 4 weeks old. (I have been called crazy a few times over this.)

The last 19 weeks have been about Sam and getting settled into our new world. We still have a lot to settle, but I finally feel like enough progress has been made that I can get back to crafting regularly and blogging about the things I make and experience.

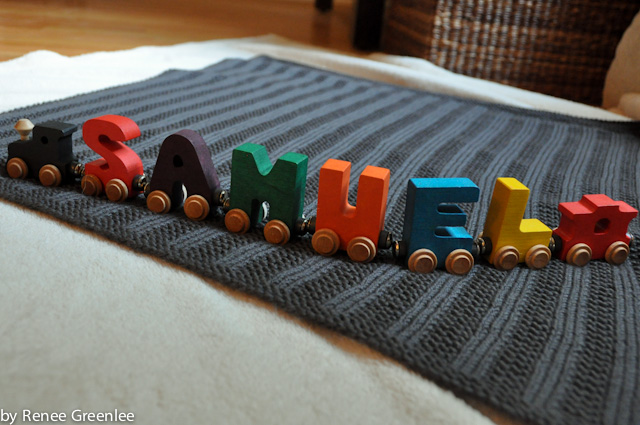
The above photo was recently taken by local photographer and incredible person, Renee Greenlee. Aside from being amazing, she is so talented. The train name was a gift from a long family friend, and it is sitting on a beautiful hand-knitted blanket from my friend, Denee. (Denee also recently completed a 12 foot long replica of the 4th season Dr. Who scarf.)